
Build the structure
How to build the menu: first the section, then the space inside it, with the right module, visibility and who can post. With a complete example and what to check before you open.
The community's structure is the menu on the left, in three levels:
The community already comes with the Home section and a Feed. Here you create your first section and, inside it, your first space. Before you start, read Roles and permissions: that's where it explains who sees and who posts in each space.
Role for everything in this article: owner or admin.
1. Plan with three questions
| Question | Where it's decided | Example |
|---|---|---|
| What areas does the community have? | Sections | Start here, Community, Student area |
| What happens in each area? | Spaces and their modules | Lessons (Courses), Live sessions (Events), Board (Feed) |
| Who sees it and who posts? | Visibility and Who can post | Student area only for the plan; Announcements posted only by the staff |
If an area is paid or belongs to a cohort, create the plan or the group first: the access list only shows what already exists.
2. Create the first section
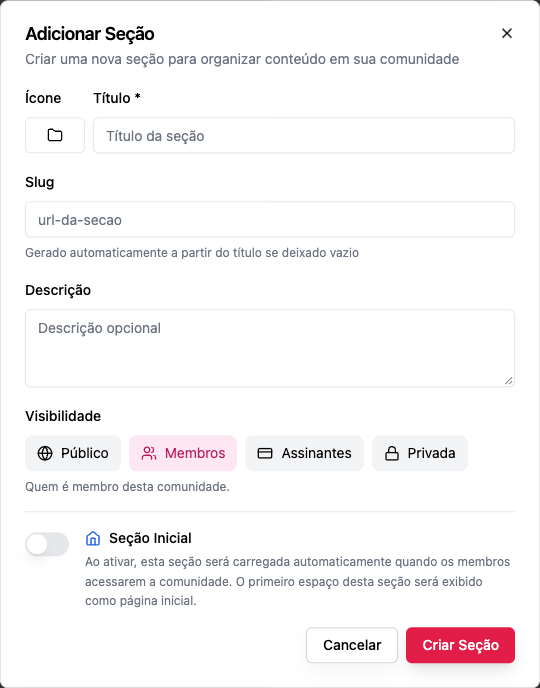
- At the end of the menu, Add Section.
- Choose the Icon and the Title (e.g. Start here).
- Leave the Slug blank (it's generated from the title).
- Visibility: Public for a showcase; Members for what belongs to the community; Subscribers or Private for restricted areas.
- Create Section.
See Sections.
3. Create the first space inside it
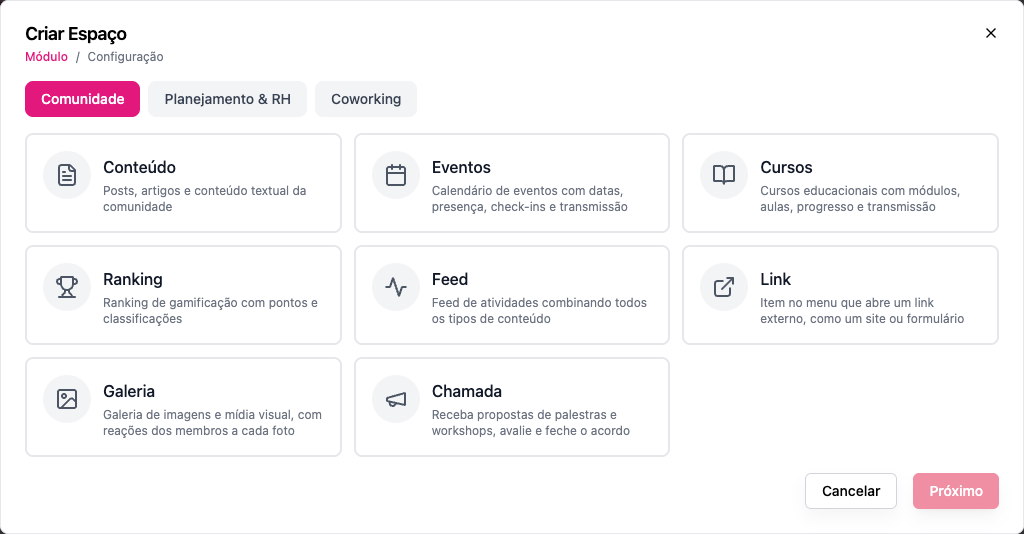
- Under the new section, Add Space.
- Choose the module (e.g. Content for the welcome page) and click Next.
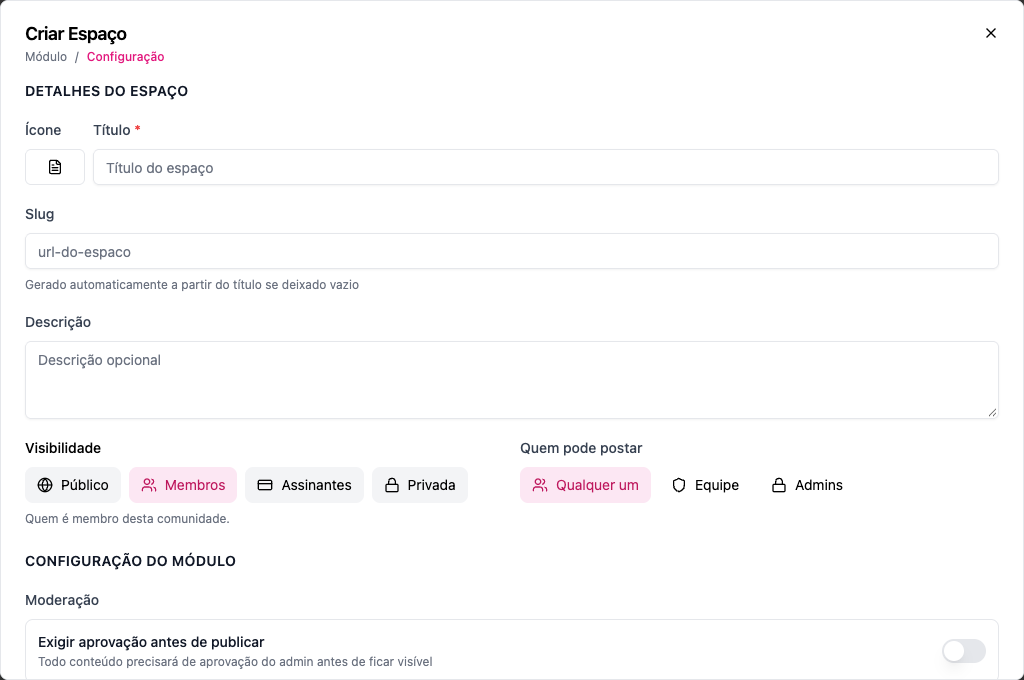
- Title (e.g. Welcome), icon and description.
- Visibility: the same as the section's, or more restricted.
- Who can post: Admins for an institutional page; Anyone for a board.
- Create Space.
4. Publish the first content
An empty space looks abandoned. Before you invite anyone:
- on the welcome page, a post explaining how the community works;
- in the Feed, a welcome status, pinned to the top;
- in the calendar, the first event.
A complete example: an online school
| Section | Visibility | Spaces |
|---|---|---|
| Start here | Public | Welcome (Content · Admins) |
| Home (already exists) | Members | Feed (Feed · Anyone) |
| Student area | Private, Student plan | Lessons (Courses · Admins) · Live sessions (Events · Staff) · Class (Feed · Anyone) |
A visitor sees Start here; a free member also sees the Feed; a paying student sees the Student area; someone without a subscription sees its spaces with the Requires a plan lock.
More ready-made structures in Create and organize spaces.
Rules worth knowing
- A space is never more open than its section.
- Drag sections and spaces to reorder them; drag a space onto another section to move it.
- A section that has spaces can't be deleted; neither can the initial section.
- Changing the module of a space that has content hides that content: choose carefully.
Frequently asked questions
Can I delete the Home section? Only after marking another section as the Initial Section.
How many sections should I create? Between 3 and 6 keeps the menu easy to read.
Do members see the changes right away? Yes.